python调用新浪微博API项目实践
因为最近接触到调用新浪微博开放接口的项目,所以就想试试用python调用微博API。
SDK下载地址:http://open.weibo.com/wiki/SDK 代码不多十几K,完全可以看懂。
有微博账号可以新建一个APP,然后就可以得到app key和app secret,这个是APP获得OAuth2.0授权所必须的。
了解OAuth2可以查看链接新浪微博的说明。 OAuth2授权参数除了需要app key和app secret还需要网站回调地址redirect_uri,并且这个回调地址不允许是局域网的(神马localhost,127.0.0.1好像都不行),这个着实让我着急了半天。我使用API也不是网站调用,于是查了很多。看到有人写可以用这个地址替代,https://api.weibo.com/oauth2/default.html,我试了一下果然可以,对于屌丝来说是个好消息。
下面先来个简单的程序,感受一下:
设置好以下参数
import sys
import weibo
import webbrowser

APP_KEY = ''
MY_APP_SECRET = ''
REDIRECT_URL = 'https://api.weibo.com/oauth2/default.html'
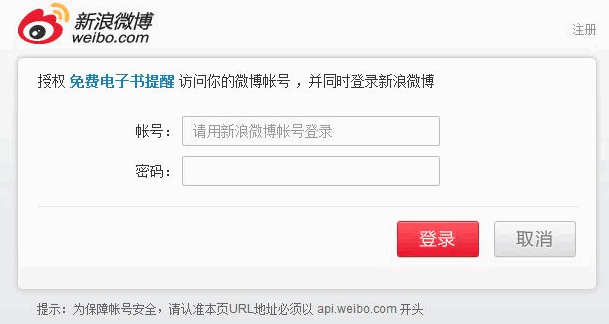
获得微博授权URL,如第2行,用默认浏览器打开后会要求登陆微博,用需要授权的账号登陆,如下图
api = weibo.APIClient(app_key=APP_KEY,app_secret=MY_APP_SECRET,redirect_uri=REDIRECT_URL)
authorize_url = api.get_authorize_url()
print(authorize_url)
webbrowser.open_new(authorize_url)

登陆后会调转到一个连接https://api.weibo.com/oauth2/default.html?code=92cc6accecfb5b2176adf58f4c
关键就是code值,这个是认证的关键。手动输入code值模拟认证
request = api.request_access_token(code, REDIRECT_URL)
access_token = request.access_token
expires_in = request.expires_in
api.set_access_token(access_token, expires_in)
api.statuses.update.post(status=u'Test OAuth 2.0 Send a Weibo!')
access_token就是获得的token,expires_in是授权的过期时间 (UNIX时间)
用set_access_token保存授权。往下就可以调用微博接口了。测试发了一条微博

但是这样的手动输入code方式,不适合程序的调用,是否可以不用打开链接的方式来请求登陆获取授权,经多方查找和参考,将程序改进如下,可以实现自动获取code并保存,方便程序服务调用。
accessWeibo

# -*- coding: utf-8 -*-
#/usr/bin/env python

#access to SinaWeibo By sinaweibopy
#实现微博自动登录,token自动生成,保存及更新
#适合于后端服务调用


from weibo import APIClient
import pymongo
import sys, os, urllib, urllib2
from http_helper import *
from retry import *
try:
import json
except ImportError:
import simplejson as json

# setting sys encoding to utf-8
default_encoding = 'utf-8'
if sys.getdefaultencoding() != default_encoding:
reload(sys)
sys.setdefaultencoding(default_encoding)

# weibo api访问配置
APP_KEY = '' # app key
APP_SECRET = '' # app secret
REDIRECT_URL = 'https://api.weibo.com/oauth2/default.html' # callback url 授权回调页,与OAuth2.0 授权设置的一致
USERID = '' # 登陆的微博用户名,必须是OAuth2.0 设置的测试账号
USERPASSWD = '' # 用户密码


client = APIClient(app_key=APP_KEY, app_secret=APP_SECRET, redirect_uri=REDIRECT_URL)

def make_access_token():
#请求access token
params = urllib.urlencode({
'action':'submit',
'withOfficalFlag':'0',
'ticket':'',
'isLoginSina':'',
'response_type':'code',
'regCallback':'',
'redirect_uri':REDIRECT_URL,
'client_id':APP_KEY,
'state':'',
'from':'',
'userId':USERID,
'passwd':USERPASSWD,
})

login_url = 'https://api.weibo.com/oauth2/authorize'

url = client.get_authorize_url()
content = urllib2.urlopen(url)
if content:
headers = { 'Referer' : url }
request = urllib2.Request(login_url, params, headers)
opener = get_opener(False)
urllib2.install_opener(opener)
try:
f = opener.open(request)
return_redirect_uri = f.url
except urllib2.HTTPError, e:
return_redirect_uri = e.geturl()
# 取到返回的code
code = return_redirect_uri.split('=')[1]
#得到token
token = client.request_access_token(code,REDIRECT_URL)
save_access_token(token)

def save_access_token(token):
#将access token保存到MongoDB数据库
mongoCon=pymongo.Connection(host="127.0.0.1",port=27017)
db= mongoCon.weibo

t={
"access_token":token['access_token'],
"expires_in":str(token['expires_in']),
"date":time.strftime('%Y-%m-%d %H:%M:%S',time.localtime(time.time()))
}
db.token.insert(t,safe=True)

#Decorator 目的是当调用make_access_token()后再执行一次apply_access_token()
@retry(1)
def apply_access_token():
#从MongoDB读取及设置access token
try:

mongoCon=pymongo.Connection(host="127.0.0.1",port=27017)
db= mongoCon.weibo
if db.token.count()>0:
tokenInfos=db.token.find().sort([("_id",pymongo.DESCENDING)]).limit(1)
else:
make_access_token()
return False

for tokenInfo in tokenInfos:
access_token=tokenInfo["access_token"]
expires_in=tokenInfo["expires_in"]

try:
client.set_access_token(access_token, expires_in)
except StandardError, e:
if hasattr(e, 'error'):
if e.error == 'expired_token':
# token过期重新生成
make_access_token()
return False
else:
pass
except:
make_access_token()
return False

return True

if __name__ == "__main__":
apply_access_token()

# 以下为访问微博api的应用逻辑
# 以发布文字微博接口为例
client.statuses.update.post(status='Test OAuth 2.0 Send a Weibo!')
retry.py

import math
import time

# Retry decorator with exponential backoff
def retry(tries, delay=1, backoff=2):
"""Retries a function or method until it returns True.

delay sets the initial delay, and backoff sets how much the delay should
lengthen after each failure. backoff must be greater than 1, or else it
isn't really a backoff. tries must be at least 0, and delay greater than
0."""

if backoff <= 1:
raise ValueError("backoff must be greater than 1")

tries = math.floor(tries)
if tries < 0:
raise ValueError("tries must be 0 or greater")

if delay <= 0:
raise ValueError("delay must be greater than 0")

def deco_retry(f):
def f_retry(*args, **kwargs):
mtries, mdelay = tries, delay # make mutable

rv = f(*args, **kwargs) # first attempt
while mtries > 0:
if rv == True or type(rv) == str: # Done on success ..
return rv

mtries -= 1 # consume an attempt
time.sleep(mdelay) # wait...
mdelay *= backoff # make future wait longer

rv = f(*args, **kwargs) # Try again

return False # Ran out of tries :-(

return f_retry # true decorator -> decorated function
return deco_retry # @retry(arg[, ...]) -> true decorator
http_helper.py

# -*- coding: utf-8 -*-
#/usr/bin/env python

import urllib2,cookielib

class SmartRedirectHandler(urllib2.HTTPRedirectHandler):
def http_error_301(cls, req, fp, code, msg, headers):
result = urllib2.HTTPRedirectHandler.http_error_301(cls, req, fp, code, msg, headers)
result.status = code
print headers
return result

def http_error_302(cls, req, fp, code, msg, headers):
result = urllib2.HTTPRedirectHandler.http_error_302(cls, req, fp, code, msg, headers)
result.status = code
print headers
return result

def get_cookie():
cookies = cookielib.CookieJar()
return urllib2.HTTPCookieProcessor(cookies)

def get_opener(proxy=False):
rv=urllib2.build_opener(get_cookie(), SmartRedirectHandler())
rv.addheaders = [('User-agent', 'Mozilla/4.0 (compatible; MSIE 6.0; Windows NT 5.1; SV1)')]
return rv

