Python实现感知器模型、两层神经网络
本文实例为大家分享了Python实现感知器模型、两层神经网络,供大家参考,具体内容如下
python 3.4 因为使用了 numpy
这里我们首先实现一个感知器模型来实现下面的对应关系
[[0,0,1], ——- 0
[0,1,1], ——- 1
[1,0,1], ——- 0
[1,1,1]] ——- 1
从上面的数据可以看出:输入是三通道,输出是单通道。
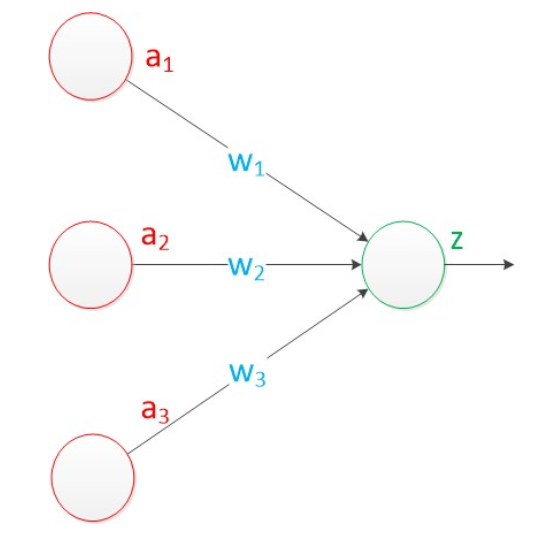
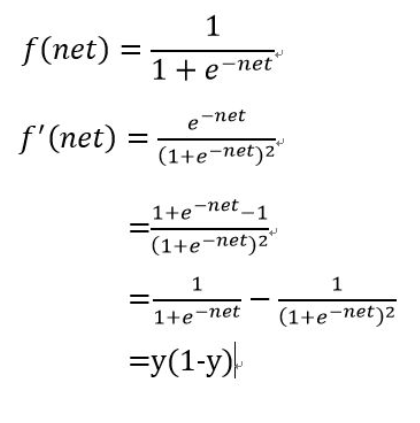
这里的激活函数我们使用 sigmoid 函数 f(x)=1/(1+exp(-x))
其导数推导如下所示:
L0=W*X;
z=f(L0);
error=y-z;
delta =error * f'(L0) * X;
W=W+delta;
python 代码如下:
import numpy as np

#sigmoid function

def nonlin(x, deriv = False):
  if(deriv==True):
    return x*(1-x)
  return 1/(1+np.exp(-x))


# input dataset

X=np.array([[0,0,1],
      [0,1,1],
      [1,0,1],
      [1,1,1]])

# output dataset

y=np.array([[0,1,0,1]]).T

#seed( ) 用于指定随机数生成时所用算法开始的整数值,
#如果使用相同的seed( )值,则每次生成的随即数都相同,
#如果不设置这个值,则系统根据时间来自己选择这个值,
#此时每次生成的随机数因时间差异而不同。
np.random.seed(1)

# init weight value with mean 0

syn0 = 2*np.random.random((3,1))-1

for iter in range(1000):
  # forward propagation
  L0=X
  L1=nonlin(np.dot(L0,syn0))

  # error
  L1_error=y-L1

  L1_delta = L1_error*nonlin(L1,True)

  # updata weight
  syn0+=np.dot(L0.T,L1_delta)

print("Output After Training:")
print(L1)
从输出结果可以看出基本实现了对应关系。
下面再用两层网络来实现上面的任务,这里加了一个隐层,隐层包含4个神经元。
import numpy as np

def nonlin(x, deriv = False):
  if(deriv == True):
    return x*(1-x)
  else:
    return 1/(1+np.exp(-x))

#input dataset
X = np.array([[0,0,1],
       [0,1,1],
       [1,0,1],
       [1,1,1]])

#output dataset
y = np.array([[0,1,1,0]]).T

#the first-hidden layer weight value
syn0 = 2*np.random.random((3,4)) - 1

#the hidden-output layer weight value
syn1 = 2*np.random.random((4,1)) - 1

for j in range(60000):
  l0 = X
  #the first layer,and the input layer
  l1 = nonlin(np.dot(l0,syn0))
  #the second layer,and the hidden layer
  l2 = nonlin(np.dot(l1,syn1))
  #the third layer,and the output layer


  l2_error = y-l2
  #the hidden-output layer error

  if(j%10000) == 0:
    print "Error:"+str(np.mean(l2_error))

  l2_delta = l2_error*nonlin(l2,deriv = True)

  l1_error = l2_delta.dot(syn1.T)
  #the first-hidden layer error

  l1_delta = l1_error*nonlin(l1,deriv = True)

  syn1 += l1.T.dot(l2_delta)
  syn0 += l0.T.dot(l1_delta)

print "outout after Training:"
print l2
以上就是本文的全部内容,希望对大家的学习有所帮助,也希望大家多多支持【听图阁-专注于Python设计】。