python生成九宫格图片
本文实例为大家分享了Python九宫格图片生成的具体代码,供大家参考,具体内容如下
利用Image类将一张图片分割成9张,发朋友圈利器,打包成EXE后,长期使用。
效果大致是:
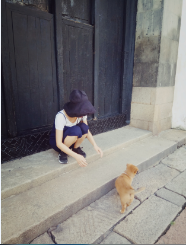
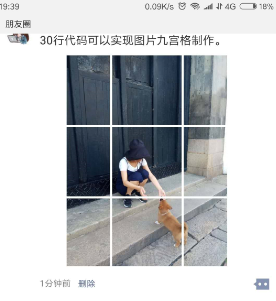
库:pillow
源码:
# pengyouquanPicture.py
# 朋友圈九宫格图片制作

from PIL import Image
import sys

# 先将input image 填充为正方形
def fill_image(image):
 width, height = image.size
 #选取原图片长、宽中较大值作为新图片的九宫格半径
 new_image_length = width if width > height else height
 #生产新图片【白底】
 new_image = Image.new(image.mode,(new_image_length, new_image_length), color='white')
 #将原图粘贴在新图上,位置为居中
 if width > height:
 new_image.paste(image,(0, int((new_image_length-heigth) / 2)))
 else:
 new_image.paste(image,(int((new_image_length-width) / 2), 0))
 return new_image

# 将图片切割成九宫格
def cut_image(image):
 width, height = image.size
 #一行放3张图
 item_width = int(width / 3)
 box_list = []
 for i in range(0,3):
 for j in range(0,3):
 box = (j*item_width,i*item_width,(j+1)*item_width,(i+1)*item_width)
 box_list.append(box)
 image_list = [image.crop(box) for box in box_list]
 return image_list
#保存图片
def save_images(image_list):
 index = 1
 for image in image_list:
 image.save(str(index) + '.png', 'PNG')
 index += 1

if __name__ == '__main__':
 file_path = "1.jpg"
 image = Image.open(file_path)
 #image.show()
 image = fill_image(image)
 image_list = cut_image(image)
 save_images(image_list)
打包EXE:
pyinstaller.exe -F pengyouquanPicture.py -i "b8.ico"

把EXE文件和要分割的图片放在一个路径下,人后图片重命名为1.jpg ,直接执行exe 就可以得到9张照片啦。
PS:怎么打包成APP,后面再研究研究。
以上就是本文的全部内容,希望对大家的学习有所帮助,也希望大家多多支持【听图阁-专注于Python设计】。