PyQt5使用QTimer实现电子时钟
本文用 PyQt5 的QTimer类的两种方式实现电子时钟,供大家参考,具体内容如下
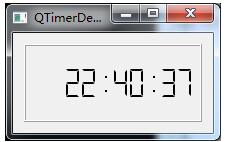
【效果图】
【知识点】
QTimer类提供了定时器信号/槽和单触发定时器。
它在内部使用定时器事件来提供更通用的定时器。
QTimer很容易使用:创建一个QTimer,使用start()来开始并且把它的timeout()连接到适当的槽。当这段时间过去了,它将会发射timeout()信号。
【实现】
1、定时器信号/槽方式
class MyTimer(QWidget):
  def __init__(self, parent = None):
    # ......

    #新建一个QTimer对象
    self.timer = QTimer()
    self.timer.setInterval(1000)
    self.timer.start()

    # 信号连接到槽
    self.timer.timeout.connect(self.onTimerOut)

  # 定义槽
  def onTimerOut(self):
    self.lcd.display(time.strftime("%X",time.localtime()))
完整代码:
import sys
import time
from PyQt5.QtCore import *
from PyQt5.QtGui import *
from PyQt5.QtWidgets import *

class MyTimer(QWidget):
  def __init__(self, parent = None):
    super(MyTimer, self).__init__(parent)
    self.resize(200, 100)
    self.setWindowTitle("QTimerDemo")

    self.lcd = QLCDNumber()
    self.lcd.setDigitCount(10)
    self.lcd.setMode(QLCDNumber.Dec)
    self.lcd.setSegmentStyle(QLCDNumber.Flat)
    self.lcd.display(time.strftime("%X",time.localtime()))

    layout = QVBoxLayout()
    layout.addWidget(self.lcd)
    self.setLayout(layout)

    #新建一个QTimer对象
    self.timer = QTimer()
    self.timer.setInterval(1000)
    self.timer.start()

    # 信号连接到槽
    self.timer.timeout.connect(self.onTimerOut)

  # 定义槽
  def onTimerOut(self):
    self.lcd.display(time.strftime("%X",time.localtime()))


app = QApplication(sys.argv)
t = MyTimer()
t.show()
sys.exit(app.exec_())
2、定时器事件方式
class MyTimer(QWidget):
  def __init__(self, parent = None):
    # ......

    #新建一个QTimer对象
    self.timer = QBasicTimer() # QTimer()貌似不行,不知何故?
    self.timer.start(1000, self)

  # 覆写计时器事件处理函数timerEvent()
  def timerEvent(self, event):
    self.lcd.display(time.strftime("%X",time.localtime()))
完整代码:
import sys
import time
from PyQt5.QtCore import *
from PyQt5.QtGui import *
from PyQt5.QtWidgets import *

class MyTimer(QWidget):
  def __init__(self, parent = None):
    super(MyTimer, self).__init__(parent)
    self.resize(200, 100)
    self.setWindowTitle("QTimerDemo")

    self.lcd = QLCDNumber()
    self.lcd.setDigitCount(10)
    self.lcd.setMode(QLCDNumber.Dec)
    self.lcd.setSegmentStyle(QLCDNumber.Flat)
    self.lcd.display(time.strftime("%X",time.localtime()))

    layout = QVBoxLayout()
    layout.addWidget(self.lcd)
    self.setLayout(layout)

    #新建一个QTimer对象
    self.timer = QBasicTimer() # QTimer()貌似不行,不知何故?
    self.timer.start(1000, self)

  # 覆写计时器事件处理函数timerEvent()
  def timerEvent(self, event):
    if event.timerId() == self.timer.timerId():
      self.lcd.display(time.strftime("%X",time.localtime()))
    else:
      super(WigglyWidget, self).timerEvent(event)


app = QApplication(sys.argv)
t = MyTimer()
t.show()
sys.exit(app.exec_())
以上就是本文的全部内容,希望对大家的学习有所帮助,也希望大家多多支持【听图阁-专注于Python设计】。