python多线程同步之文件读写控制
本文实例为大家分享了python多线程同步之文件读写控制的具体代码,供大家参考,具体内容如下
1、实现文件读写的文件ltz_schedule_times.py
#! /usr/bin/env python
#coding=utf-8
import os

def ReadTimes():
  res = []
  if os.path.exists('schedule_times.txt'):
    fp = open('schedule_times.txt', 'r')
  else:
    os.system('touch schedule_times.txt')
    fp = open('schedule_times.txt', 'r')
  try:
    line = fp.read()
    if line == None or len(line)==0:
      fp.close()
      return 0
    tmp = line.split()
    print 'tmp: ', tmp
    schedule_times = int(tmp[-1])
  finally:
    fp.close()
  #print schedule_times
  return schedule_times

def WriteTimes(schedule_times):
  if schedule_times <= 10:
    fp = open('schedule_times.txt', 'a+')#10以内追加进去
  else:
    fp = open('schedule_times.txt', 'w')#10以外重新写入
    schedule_times = 1
  print 'write schedule_times start!'
  try:

    fp.write(str(schedule_times)+'\n')
  finally:
    fp.close()
    print 'write schedule_times finish!'

if __name__ == '__main__':

  schedule_times = ReadTimes()
  #if schedule_times > 10:
  #  schedule_times = 0
  print schedule_times
  schedule_times = schedule_times + 1
  WriteTimes(schedule_times)
2.1、不加锁对文件进行多线程读写。file_lock.py
#! /usr/bin/env python
#coding=utf-8

from threading import Thread
import threading
import time
from ltz_schedule_times import *

#1、不加锁
def lock_test():
  time.sleep(0.1)
  schedule_times = ReadTimes()
  print schedule_times
  schedule_times = schedule_times + 1
  WriteTimes(schedule_times)


if __name__ == '__main__':

  for i in range(5):
    Thread(target = lock_test, args=()).start()
得到结果:
0
write schedule_times start!
write schedule_times finish!
tmp: tmp: tmp: tmp:   [[[['1''1''1''1']]]]


11

1
 1
write schedule_times start!write schedule_times start!

write schedule_times start!write schedule_times start!

write schedule_times finish!
write schedule_times finish!
write schedule_times finish!write schedule_times finish!
文件写入结果:
以上结果可以看出,不加锁多线程读写文件会出现错误。
2.2、加锁对文件进行多线程读写。file_lock.py
#! /usr/bin/env python
#coding=utf-8

from threading import Thread
import threading
import time
from ltz_schedule_times import *

#2、加锁
mu = threading.Lock() #1、创建一个锁
def lock_test():
  #time.sleep(0.1)
  if mu.acquire(True): #2、获取锁状态,一个线程有锁时,别的线程只能在外面等着
    schedule_times = ReadTimes()
    print schedule_times
    schedule_times = schedule_times + 1
    WriteTimes(schedule_times)
    mu.release() #3、释放锁

if __name__ == '__main__':

  for i in range(5):
    Thread(target = lock_test, args=()).start()
结果:
0
write schedule_times start!
write schedule_times finish!
tmp: ['1']
1
write schedule_times start!
write schedule_times finish!
tmp: ['1', '2']
2
write schedule_times start!
write schedule_times finish!
tmp: ['1', '2', '3']
3
write schedule_times start!
write schedule_times finish!
tmp: ['1', '2', '3', '4']
4
write schedule_times start!
write schedule_times finish!
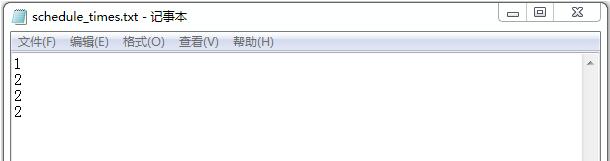
文件写入结果:

达到读写效果。
以上就是本文的全部内容,希望对大家的学习有所帮助,也希望大家多多支持【听图阁-专注于Python设计】。