详解python opencv、scikit-image和PIL图像处理库比较
进行深度学习时,对图像进行预处理的过程是非常重要的,使用pytorch或者TensorFlow时需要对图像进行预处理以及展示来观看处理效果,因此对python中的图像处理框架进行图像的读取和基本变换的掌握是必要的,接下来python中几个基本的图像处理库进行纵向对比。
项目地址:https://github.com/Oldpan/Pytorch-Learn/tree/master/Image-Processing
比较的图像处理框架:
- PIL
- scikit-image
- opencv-python
PIL:
由于PIL仅支持到Python 2.7,加上年久失修,于是一群志愿者在PIL的基础上创建了兼容的版本,名字叫Pillow,支持最新Python 3.x,又加入了许多新特性,因此,我们可以直接安装使用Pillow。
摘自廖雪峰的官方网站
scikit-image
scikit-image is a collection of algorithms for image processing. It is available free of charge and free of restriction. We pride ourselves on high-quality, peer-reviewed code, written by an active community of volunteers.
摘自官网的介绍,scikit-image的更新还是比较频繁的,代码质量也很好。
opencv-python
opencv的大名就不要多说了,这个是opencv的python版
# Compare Image-Processing Modules
# Use Transforms Module of torchvision
# &&&
# 对比python中不同的图像处理模块
# 并且使用torchvision中的transforms模块进行图像处理
# packages
from PIL import Image
from skimage import io, transform
import cv2
import torchvision.transforms as transforms
import matplotlib.pyplot as plt
%matplotlib inline
img_PIL = Image.open('./images/dancing.jpg')
img_skimage = io.imread('./images/dancing.jpg')
img_opencv = cv2.imread('./images/dancing.jpg')
img_plt = plt.imread('./images/dancing.jpg')
loader = transforms.Compose([
transforms.ToTensor()]) # 转换为torch.tensor格式
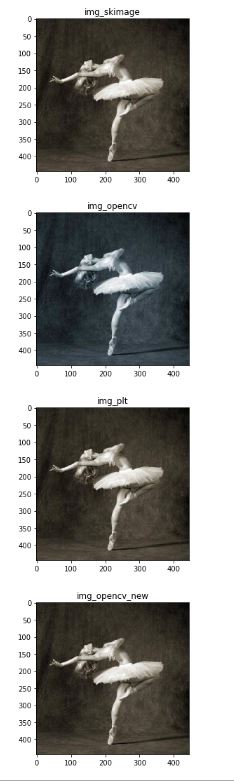
print('The shape of \n img_skimage is {}\n img_opencv is {}\n img_plt is {}\n'.format(img_skimage.shape, img_opencv.shape, img_plt.shape))
print('The type of \n img_skimage is {}\n img_opencv is {}\n img_plt is {}\n'.format(type(img_skimage), type(img_opencv), type(img_plt)))
The shape of
img_skimage is (444, 444, 3)
img_opencv is (444, 444, 3)
img_plt is (444, 444, 3)
The size of
img_PIL is (444, 444)
The mode of
img_PIL is RGB
The type of
img_skimage is <class 'numpy.ndarray'>
img_opencv is <class 'numpy.ndarray'>
img_plt is <class 'numpy.ndarray'>
img_PIL if <class 'PIL.JpegImagePlugin.JpegImageFile'>
# 定义一个图像显示函数
def my_imshow(image, title=None):
  plt.imshow(image)
  if title is not None:
    plt.title(title)
  plt.pause(0.001) # 这里延时一下,否则图像无法加载

plt.figure()
my_imshow(img_skimage, title='img_skimage')
# 可以看到opencv读取的图像打印出来的颜色明显与其他不同
plt.figure()
my_imshow(img_opencv, title='img_opencv')
plt.figure()
my_imshow(img_plt, title='img_plt')

# opencv读出的图像颜色通道为BGR,需要对此进行转换
img_opencv = cv2.cvtColor(img_opencv, cv2.COLOR_BGR2RGB)
plt.figure()
my_imshow(img_opencv, title='img_opencv_new')
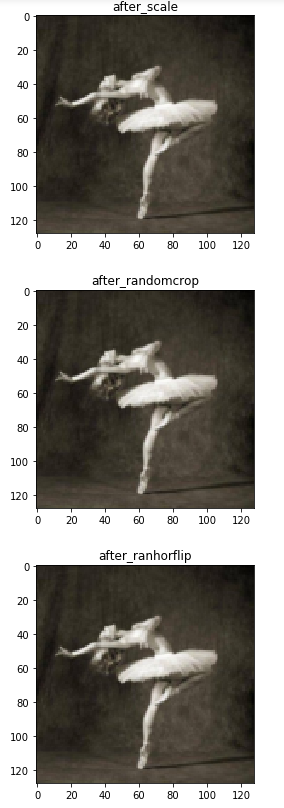
toTensor = transforms.Compose([transforms.ToTensor()])

# 尺寸变化、缩放
transform_scale = transforms.Compose([transforms.Scale(128)])
temp = transform_scale(img_PIL)
plt.figure()
my_imshow(temp, title='after_scale')

# 随机裁剪
transform_randomCrop = transforms.Compose([transforms.RandomCrop(32, padding=4)])
temp = transform_scale(img_PIL)
plt.figure()
my_imshow(temp, title='after_randomcrop')

# 随机进行水平翻转(0.5几率)
transform_ranHorFlip = transforms.Compose([transforms.RandomHorizontalFlip()])
temp = transform_scale(img_PIL)
plt.figure()
my_imshow(temp, title='after_ranhorflip')

# 随机裁剪到特定大小
transform_ranSizeCrop = transforms.Compose([transforms.RandomSizedCrop(128)])
temp = transform_ranSizeCrop(img_PIL)
plt.figure()
my_imshow(temp, title='after_ranSizeCrop')

# 中心裁剪
transform_centerCrop = transforms.Compose([transforms.CenterCrop(128)])
temp = transform_centerCrop(img_PIL)
plt.figure()
my_imshow(temp, title='after_centerCrop')

# 空白填充
transform_pad = transforms.Compose([transforms.Pad(4)])
temp = transform_pad(img_PIL)
plt.figure()
my_imshow(temp, title='after_padding')

# 标准化是在整个数据集中对所有图像进行取平均和均方差,演示图像数量过少无法进行此操作
# print(train_data.mean(axis=(0,1,2))/255)
# print(train_data.std(axis=(0,1,2))/255)
# transform_normal = transforms.Compose([transforms.Normalize()])

# Lamdba使用用户自定义函数来对图像进行剪裁
# transform_pad = transforms.Compose([transforms.Lambda()])
以上就是本文的全部内容,希望对大家的学习有所帮助,也希望大家多多支持【听图阁-专注于Python设计】。